Favorite Headboards

I have always had a love affair with tufted headboards.  Really, anything tufted just makes my heart skip.  As I was looking around for one, I decided to take on a not-so-little diy project.  In the end it was totally worth it!  Coming in at about $150, I saved myself quite a bit on my king size tufted headboard.

I love the finished product and hope you get inspired to make one of your own.  Here are some good headboards that I considered replicating.  I love the tufting, but then leaned toward a nailhead trim on a simple curvy shape, then went to a slip-covered design, and then back to tufting.  Enjoy!

guest-0193-18-2
via cote de texas (I love the huge nailhead!)

rast
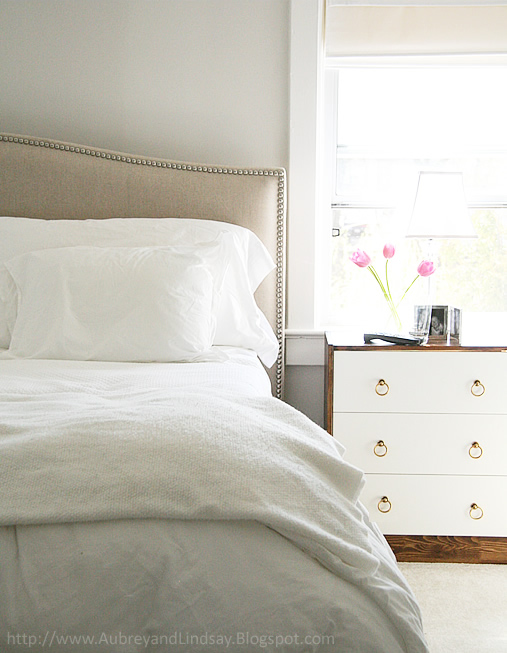
via aubrey and lindsay (And I still love the ikea hacked side dressers!)


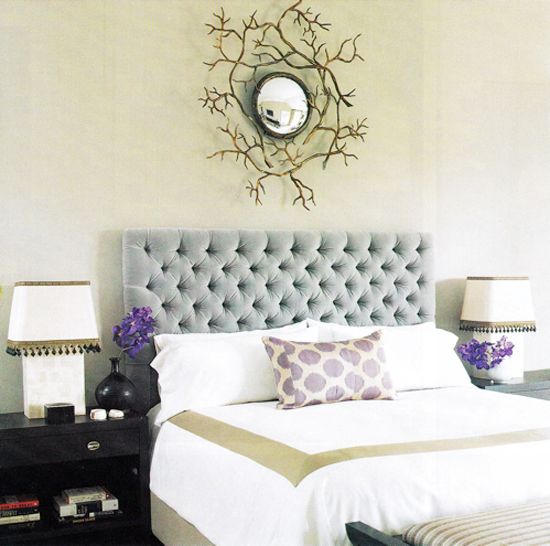
via Desire to Inspire (Look closely at the bedspread...you might see it on my bed.  And that tufting!  I did 53 buttons myself and I know this would be a ton of work!!)

Turquoise Velvet Tufted headboard
via cre8tive design (She has a great cheater method including stapling and hot glue...tufting is for everyone!  This includes a full tutorial.)
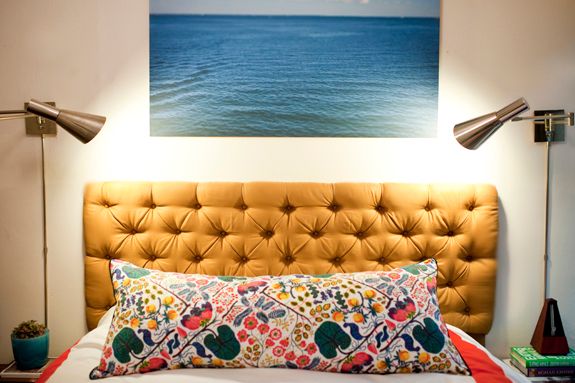

via bhg (This is the slipcovered tutorial I thought of using, full tutorial included.)

via domino
Suzie: Domicile Interior Design  Rue Mag  chic bedroom design with gorgeous chic bedroom design ...
via Rue Mag (Crisp white and navy blue...my favorite.)


I used a great tutorial from the Little Green Notebook when I made mine.  She has some great tips...like using PEG BOARD!  I wish I had thought of that before buying my heavy mdf.  The holes are drilled and it's light-weight.  

Here's my pinterest bedroom board if you're interested.  I know it was false advertisement to tell you about the one I made.  I promise it's coming up...

Wainscot in the Bathroom

Our master bath has been asking for love.  I finally responded.

The wall beneath the bathtub was asking for more than a coat of paint, so I decided to do my own short wainscot on that wall.  I really like the way it turned out and it was a really easy thing to do.

Before and After
Paint color before: Sherwin Williams Camelback & after: Sherwin Williams Dovetail. Trim color is Sherwin Williams Dover White


And in case you want to do the same thing, here's my instructions.

The top of my baseboards tapered to 1/4" so I got my wood to match at 1/4" thick.  I didn't want the wood pieces to stick out over the edge of my baseboards.

The top piece of wood I cut to fit the length.  Then I divided the space into 5 (adjust according to your space and desired width).  Make sure to add edge pieces into your dimensions.  You don't want to make an extra trip to Home Depot just for 17" of board.  That would be so annoying (no, I didn't do that...just want to save you the headache).

When I was at Home Depot, I had them cut the top piece to length for me.  You could have them do the short ones as well, just make sure they don't cut them too short.  A little sanding of a slightly too big piece is better than having to get more wood.

I marked the wall and fastened my boards with a nail gun.  You might need to hammer some of them in a little more.  Then I used caulk and filled in the little dents on top of the wood. 

One thing to do different next time: don't over caulk!  I put way to much on and had to sand before I painted.  Just the littlest amount to seal the holes.  

I also caulked the edges around the insides.  It definitely gives a finished look.  Let dry, sand if needed, and paint to match.  Now go wainscot something!


White Chocolate Chip Orange Cookies (AKA Miracle Cookies)

I've officially found my new people for cookie recipes.  Thank you Ryan and Mandy!

First, I had their semi-sweet and white chocolate chips cookies...to die for.  I took a picture of the recipe with my phone and have made them probably four times since.  Then we had them over for dinner and they handed a recipe when they walked through the door.  Excellent!  We already understand one another.  :)

These are so good because of the orange.  You omit the vanilla and add the orange zest and they really are amazing.  Enjoy!

Miracle White Chocolate Chip Orange Cookies
From Ryan and Mandy

2 1/4 cups all-purpose flour
3/4 tsp baking soda
1/2 tsp salt
1 cup (2 sticks) butter or margarine, softened
1/2 cup granulated sugar
1/2 cup packed light brown sugar
1 large egg
2-3 tsp grated orange peel
2 cups (12 oz pkg.) white chocolate morsels

Preheat oven to 350 degrees.

Combine flour, baking soda, and salt in small bowl.  Beat butter, granulated sugar and brown sugar in large mixer bowl until creamy.  Beat in egg and orange peel.  Gradually beat in flour mixture.  Stir in morsels.  Drop by rounded tablespoons onto ungreased baking sheets.

Bake for 10-12 minutes or until edges are lightly golden brown.  Cool on baking sheet for 2 minutes; remove to wire racks to cool completely.

 I just love those specks of orange zest!  I might have to make these again today...this is making me hungry.

A Bird Valance

I grew up in Montana and still to this day, when I visit my parents, I know I'm home when I hear a meadow lark trilling its song.  Really, that's the thing that gets me.  So little birds, welcome to my home.

Today I'm showing you my kitchen valance.

I needed a fabric that was going to be forgiving on a wide window.  These windows come in at 65" and with home decor fabric only reaching 54", I knew I'd be piecing something together.  This did the trick and I'm so glad.

The two ties are removable, just sewn loops that I placed after putting the birds up.  It's an easy way to get the look without worrying about sewing them on.  To add width, I added two extra pieces to either end so the additions would keep the drapery symmetrical.  Done and done.
 (I wish that sun shining through was actually what today was like!  Rain and more rain is the norm right now.)


Linked up to:

Mirror, mirror, on the wall

If you look at my browser, craigslist has the top hits on my computer.  I'm a craigslist nerd, I admit.  But look what I found!
The mirror used to be gold, but with a little white spray paint, now I have a cool oval mirror to grace my mantel.  (My diy mantel here).

The candlestick holders are from Ikea.  They come white and I added some spray paint to them as well. The books are covered with a bag I got from a giftshop in Tillamook, the vase is Ikea, the flowers are Joanns, the clock is Target, and the little birds that I love are from fab.com.

Oh, and the light you can see in the reflection is last year's birthday present (that I talked about here) from overstock.com.  I love love love love it!

Decorating a mantel is a little trickier than I thought and I'm always trying to get some new fun ideas to make it look classy and not sloshed together.  


Here's a picture from the original posting.

Linked up to:

Chicken Wire Pegboard

Over Christmas we went through some model homes with my in-laws in California.  It is always so fun to go into professionally decorated spaces.  Lots of good ideas and actually some bad...really.  

I think my family thought I was crazy...I was lifting up couches to peek under them (you can't pass up knowing where an amazing couch is from!).  I didn't find any identification on the furniture.  I'm sure they do that on purpose, but I was still bummed.  I had to examine the walls, the artwork, everything.  I had to come away with at least one good diy.  Success.  Here you go.

This is our chicken wire pegboard that is hanging in our boys' room.  

I used baseboard molding for the frame, secured it with wood staples and other wood painted the same color as the boys' walls, and stapled on chicken wire.  Then I used ikea clips (I think they are about $8 a pack) to have permanent hanging devices on the frame.  

I really like how it turned out!  The little pegboard that used to be in their room just wasn't cutting it.  Now we have something masculine and large enough to hold all their inspiration.


(I had to hang a couple thing on here for you...don't worry, it's quite filled now.)

These are the ikea clips.  I secured them with some pliers.

This is the picture I took (compliments to my phone camera) at the model home.  I think we did a good job replicating it.
***Upon further thought and inspection, skip the baseboard molding and get some real wood.  Sure, it's not going to have a decorative edge, but it is going to be a lot more secure!

Linked up to:
Related Posts Plugin for WordPress, Blogger...