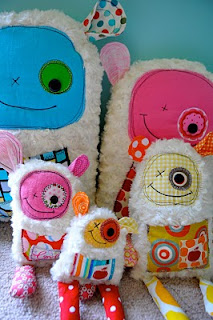
Yea, I'm back!!

I am so excited to be writing today!  I have thought of you all often and am excited to get things going again.  Thanks for sticking with me through the beginning of pregnancy...and then the busy Thanksgiving/Christmas season.

So let's see, the other important thing to note is that I'm having a BOY.  We are very excited, especially my 4-year-old buddy.  So be on the look-out for future baby boy projects.

this is me excited to see you...I know I'm dorky :)

And with you all in mind, I have several things to show you.  I promise I've actually done things in the past months besides grow out of my pants.

Sweet & Salty Treats

I love these little morsels because they literally *jump* into my mouth and then I realize I just ate 10.  They are that good.  I made a bunch and set off on a delivery journey with holiday treat bags.  I just wish I could have made more.  For those that got one, I'm glad to share; for those that didn't, I didn't do it on purpose.  Make them following THIS recipe from allrecipes.

The fun part of this treat is you can make them lots of different ways.  #1 - change the shape of the pretzel: round, square, or twisty.  #2 - change the chocolate: kisses, hugs, carmel kisses, rolos (just note that they are different cooking times).  And #3 - change your topper: walnut, pecan, m&m, etc.  It's going to be an easy crowd pleaser.


Christmas Napkin Holders

We had Secret Christmas Carolers this holiday season and each night they would leave us something on our doorstep.  One night it was these clever napkin holders.  They really would be so easy to make.  Just in case you needed some inspiration (I know, I know, Christmas is past)...but this could be copied to an arrow shape for Valentine's Day or a Shamrock with a long stem for St. Patrick's Day.  Really people, the possibilities are endless.


Curry & Naan...mmmmmmmmm

This is my favorite chicken curry recipe.  I also made some naan from THIS recipe that is delicious.  The sauce is the same the Tamarind Sauce from this past post.
So I feel like I need to justify myself by saying this, but this curry recipe is actually from cooks.com.  I really don't like that cooking site.  I think there is no advice and a general lack of responsibility of people posting recipes.  I'm sure there's good stuff on there, but after several bad recipes, I moved on.  This is probably the only recipe from this site that I use as the automatic go-to...and it's very worth it.  So here's the link to the recipe.  

For my own notes to the recipe: 
I do not use whole chickens, but maybe at least 4 chicken breasts.  
Fresh ginger really adds amazing flavor.
I use at least 2 cans petite dices tomatoes instead of fresh.
The yogurt really adds a good texture and creaminess.  I've even used greek yogurt in place of plain.

I hope you try it and drool the whole time.  :)

Table Napkins

As for my sewing machine, well it's seen more dust than light recently and I'm so excited to change that! I did pull it out right before Christmas to make my mom and sis-in-law each a set of fun table napkins.  As I was going through my fabric stash I got super excited to make several of my own sets.  

The easy instructions:
Buy corresponding fabric in fat quarters (or cut 18" x 21" pieces)
Hem all the edges

That's it.  So easy and so cute!  I like the matching/non-matching of these.  I want some like this for me and some matching too.  We move into our new house (almost done being built) in a month and we have a new table and chairs waiting for us.  It will need some good linens to go with it.  I'll have to make some chic table runners as well.    

Amazing Buns!

I'm not talking about exercise here!  Although my walk tonight did my buns some good.

I know I've been MIA and I can't promise I'll be here tomorrow, but know that I want to be.  I'm so happy you're all still here!  I start the day feeling sick, start to feel better enough to do dishes, laundry, and think about bathrooms, but then the kids want me to play, and then I muster the rest of the energy for the day into dinner, and by then I'm to tired and ill feeling for anything else.  I'm just over 12 weeks, so I'm crossing my fingers that somewhere in the next week I'll wake up and feel perfectly healthy and have my stomach back to normal.

So I got into a bread making mood today and couldn't resist trying out a new recipe.  Bread is my downfall, I'm sure I'm not alone.  :)  Some friends had us over for dinner and served these rolls and today I called her for the recipe.  She gave me the link to her Mom's food blog Creme Sue-ley and I busted out the kitchen aid and made the herfen 48 roll batch.  We're in heaven here at my house...and it smells so good!

Browsing through Creme Sue-ley, there are some yummy recipes that I'm excited to try out.  You'll have to take a peek.  In the mean time...here's some eye candy:

P.S. I had high hopes of eating some Leek Soup with my rolls tonight, but maybe tomorrow we will end up enjoying them together!  It was a delicious hot dog night at our house!  What did you have for dinner?  (Really, I need some ideas!)

My real excuse

Not that I deserve an excuse for lacking in the creative department, but I do have something that qualifies.  I have #3 in the oven!  We're excited over here, but also battling nausea, tiredness, and constantly trying to find something that sounds good to eat.  My success for the past almost 2 weeks has been getting a decent dinner on the table, at least every other day.  I am about 10 weeks along and my sickness in the past has ended about 13 weeks, so there is an end it sight.  Well...there better be!
So my attempt for the next little while, until I find some creative adrenaline, is to give you some recipes I've been making and showing you some fun Halloween things.  When I wake up and realize I feel normal again, then we'll be on a roll!  

I don't want to promise anything, but I really want to do a Halloween apron giveaway for my awesome readers who have stuck through my slacking!  

For the meantime, enjoy the beautiful fall season!

I love pasta salad

I needed something fresh the other night.  So after stopping by Trader Joe's to pick up some good bread (and letting the kids find Moto Monkey and get a sucker) we made our way home to cook up some pasta. 

I think I like this salad so much because you can add whatever you want to it.  I think it's fun to add zucchini to things that my husband realizes he enjoys (if you ask him, he says he doesn't like it...but when I hide it he eats it without noticing).  Wa ha ha haaaa...  Okay, so for my ingredients.
Pasta Salad


Rotini Pasta, cooked according to package directions, rinsed in cold water
Italian dressing
Pepperoni, quartered
Ham, small chunks
Cheddar cheese, small chunks
Frozen peas
Red pepper, diced
Broccoli, cut in small pieces
Cauliflower, cut in small pieces
Can of white corn, drained
Zucchini, quartered and thinly sliced

Mix all together and pour at least 1/2 the bottle of dressing over the mixture or more to desired wetness and taste.  Enjoy!

Pink Ruffles

I put this one together a couple of days ago, but finally pinned down my husband to take a picture.  I'm missing some close neighbors to use as models.  (Anyone interested?)

The girly-ness of this apron is very apparent and I love it.  It really can't get much frillier!

Satin Flower Headband

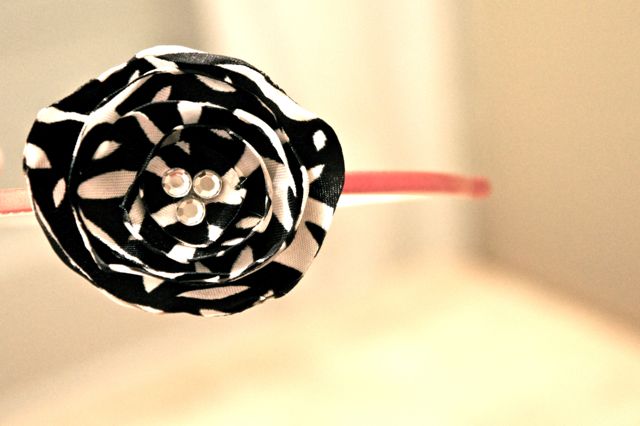
I love these flowers!  You can see how to make them using this tutorial for ribbon flowers.  In our church group I am with the teenage girls and this week was dedicated to flower making.  I was very excited to help them learn how to make felt flowers and the ribbon flowers.  I completely forgot my camera at the activity, otherwise I would show off their creations as well.  They did an awesome job!

I made this flower and then simply hot-glued it onto a little headband.  Wallah!  I really like it, especially with the contrasting headband color to flower color.  You can buy a 5-pack of headbands for a couple dollars and then glue all kinds of flowers onto them.  Have fun!

HeLa Book Review and Homemade Oreo Cookies

So today I'm giving you a book and cookies to munch on while reading!  I'm positive you'll enjoy both.

So for the book.  "The Immortal Life of Henrietta Lacks" is so well written!  The author, Rebecca Skloot, is an award winning science writer.  The book talks about HeLa cells that are all over the whole world in different scientific labs.

I had no idea what they were before reading this.  Basically, all of our cells cannot survive forever (I mean forever) if grown outside of our body.  But Henrietta's cells, taken from her cancerous growth in the 1950's, did keep growing.  That was an era where doctors didn't have to ask to use patients or their tissues, etc for research.  The book chronicles the life of Henrietta, the doctors, her family, the science field, and the HeLa cells.  Rebecca Skloot makes the story chronological and finally gives Henrietta the recognition that she deserves.  Rebecca was able to write this book because of her long relationship developed with Henrietta's daughter, Deborah.  It is respectful, it is hard, it is enlightening, and it is incredible what the science field has done.

Deborah and family were most concerned that they never saw any money from their mother's cells.  Mostly, Deborah wanted the future generations to get an education.  Rebecca Skloot has established a scholarship fund for the descendants of Henrietta Lacks.

I thought is was amazing to see a list of things that HeLa cells have aided in development.  For your own enjoyment, here's a short list:
Polio Vaccine
Cell's reaction in Space
Hybrid Research with plants
Cloning research
Human Gene Mapping leading to down syndrome and klinefelter syndrome, etc discoveries
Successful Transportation of cells
The way Herpes, Measles, Mumps, Fowl Pox, Equine Encephalitis viruses attack cells
How to freeze cells without harming or changing them
Radiation/Nuclear Bomb study
Study of Pressure's influence on cells
Steriods
Chemotherapy drugs
Hormones
Vitamins
Environmental stress
Tuberculosis
Salmonella
Other Bacteria
Hemorrhagic Fever
And the list goes on...

So again, I recommend this book.  I really couldn't put it down.  It doesn't have intense science language or is hard to understand, it's written for everyone.  I think it's an important read because the content relates to us now; the scientific world as we know it is largely due to Henrietta.

You'll have to let me know what you think.  Enjoy.

And for some cookies!  I remember my mom making these for an elementary school bike ride with our class.  The class rode by my house where my mom served them out for everyone.  Sweet and delicious and you better have some milk close by.
Homemade Oreo Cookies
from Mama Melanie

COOKIES:
2 boxes Devil's Food Cake
4 eggs
1 1/2 cup Crisco

FROSTING:
8 oz cream cheese, softened
1/4 cup butter, softened
2 tsp vanilla
4 cups powdered sugar

Preheat oven to 350 degrees.  Mix cookie ingredients together until blended.  Roll into small balls and place on ungreased cookie sheet.  Bake about 9 minutes.  Let cool on the cookie sheet and then transfer to rack.

Mix frosting ingredients together and beat until well combined and smooth.  I find that beating for at about 5 minutes makes a better frosting - letting the powdered sugar really combine with the other ingredients.  Once cookies are completely cool, spread frosting on the bottom of one and sandwich the bottom of another (same size cookie) on top.

Enjoy with a glass of milk!

Open

It's for real.  I have the first thing listed in my etsy store.  For those who have done this, please send me any tips that you can think of!  I am feeling very new to this.  I had planned on more to be up, but the last 2 days my machine is being mean.  Right now I'm ready to throw in the towel and get a new one, but we'll see.

As soon as I get my machine going, I have some quilts from the past to show you.  One of them is a home-made batik quilt from high school and a family quilt with picture transfers on it.  It's kind-of fun to revisit projects that took a lot of time and love to create, even if it was from a while ago.

Little Girl Ruffle Apron

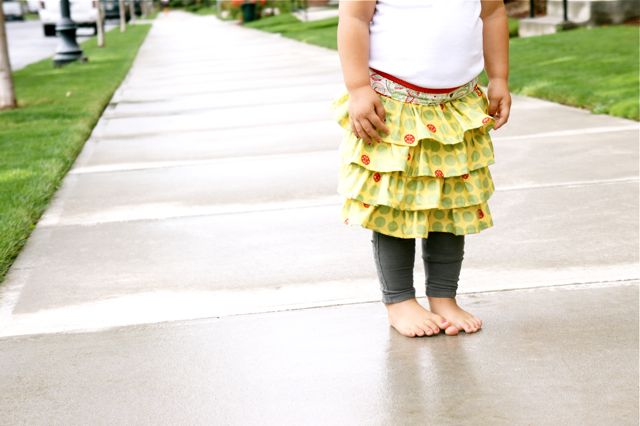
I love these ruffle aprons!  Seriously, can it get much cuter!!  Recently you can see this one I made for my friend in an orange theme.  In that post, there is a link to other past ruffle aprons, if you're interested.

I couldn't resist this adorable ladybug fabric.  And what better than to make a sweet little girl's apron.  It really would be cute as a skirt, but I'm sticking to aprons for now.  I wrapped the long strings around back, front, and then tied in back.  I like the look of the contrasting ties to the front of the apron.

Just FYI - this will be available in my future etsy shop.  Any color request to personalize the order is welcomed.  Won't this be fun!?  I think so.

Would you buy this?  (I really want to know).  And if not, what could I do differently?  Thanks for the feedback. 

A Little View of the Day

Today has been an apron day!  I have 9 aprons in the works by the end of tonight and here's a few pictures to wet your appetite.  I have some more ironing to do to prepare for sewing tomorrow.  I did a lot of cutting and planning today.  Here's to a happy Tuesday night!


Selling News!

This is an exciting post to give you!  I'm doing it, I'm making my own Etsy shop.  It will be up and running on Friday.  It will be simple at first, but I'm excited to see where it goes.  Look forward to the weekend!


(image from Etsy.com)

Happy Birthday Self!

Yes, I've been MIA.  I have good reasons...although they really sound just like excuses.

1) My little buddy started preschool this past week.  We got the picture on the front porch with the sign saying "Preschool 2010."  So cute.  I dropped him off and felt the crying emotion building, but I held it in.  He was going to be okay...and he was.  I left him at school where he knew no one and he came away with a new friend.  This is going to be great!  So we're getting used to a new schedule around here.  Tomorrow marks another day of preschool and little girl starting dancing school.  She is SO excited for ballet.  2-year-olds in leotards cannot get much cuter.  I'm looking forward to taking pictures.

2) My parents were in town last weekend and my sister was in town this weekend.  The later was a surprise.  My bday was yesterday and she decided to come in and join me for the celebration.  I turned 27 - the age I remember my mom turning, the age she's stuck at in my head.  Does your mom have an age in your head, too?

P.S. I had a blast, Nan!  I'm so glad we garage-saled for my bday and we found those halloween costumes for the kids ($5)...and $1 scrapbook paper for you!

3) I'm finally really excited for our house.  When we made the offer and then we had it, we gave them money, and looked at each other...aaahh!  Wow.  We're going to be settled.  I'm very excited.  We are always talking about it now.

4) Honestly I've been hooked to the summer show finales that have been happening.  ie. Psych, Burn Notice, White Collar, and my new favorite Covert Affairs.  Being a lazy bum in the evening seemed easier than sewing...no excuses!  How about you guys, any favorite shows out there?

And I guess that's it.  To make up for it, here's some exciting things:

I got a new camera!  I am so in love right now.  No, I haven't kissed it, but I check on it every so often, just to make sure it's safe and feels loved.  It is a Sony NEX-3.  It has the body of a point-and-shoot but the lens of a DSLR.  So I get crisp pictures with a small body.  There are a billion settings on it too, so I'm having fun reading the manual.  Like I already didn't take enough pictures.  Thank you everyone for birthday money!

I love how this camera shoots food.  Clean pictures.  My sis and I braved an Indian Restaurant Channai Masala and it was excellent.  It is really authentic Indian, so if you're in the mood for it, I would definitely recommend the lunch buffet.

1950's Better Homes Magazine to Wall Art

I was so excited to find this magazine in a "junk and stuff store" that we drove by on the way to Cannon Beach this last weekend.  I will be returning to that one again.  It is packed with lots of good stuff.  I paid 70 cents for this puppy and I'm excited about my new wall art.  There is lots more in there with good potential!
(one background looks grayer than the other...that is not the case, just lighting)

This is what I started with.  The magazine is so funny!  It says things like, "Linoleum laughs at muddy feet," you can completely furnish a living room with "$625.73," and "music in the dining room-why not?"  It's a fun read-through.

A House Buying Week

It has been quite the last week!  But the big news is that my husband and I are buying a house!  It is a new home and the closing date is December 31st.

The fun part about this is that we get to choose the different flooring, countertops, fixtures, colors, etc inside the house.  I've been super giddy about everything.  It a nice sized home of 2500 sq ft, so it's a home we'll be in for quite a while.  I'm planning on setting everything up like we'll live there forever, but then I'll be okay if we decide to move somewhere else in 10ish years.

I just can't wait to see it all put together!

Anyway, I had no idea all the billions of people that you have to talk to and arrange things.  Agents, loans, insurance, flooring people, and design center.  This list might seem short, but there are so many decisions for each of these things.  Deciding to buy a house is HUGE.  We really are going to be settled.  I am excited for this new adventure.

For now, you have me back.  My brain is now clear since everything is figured out now.  I have some fun things in mind for this week.  :)

All Holiday Sugar Cookies

Looking at these cookies you wouldn't be able to tell what holiday we were celebrating.  That's what happens when you make sugar cookies in August!  This is my mom's recipe and they are amazing.  This is a fluffy cakey cookie that loves frosting.  I love sugar cookies that have some thickness to them.
Sugar Cookies


1 cup margarine
2 cups sugar
2 eggs
1 tsp vanilla
3/4 cup buttermilk*
5 cups flour
2 tsp baking powder
1 tsp baking soda
1/2 tsp salt

Beat margarine, sugar, eggs, and vanilla together until smooth.  Gradually add the buttermilk*.  Add dry ingredients.  Mix.  This is a sticky dough when warm, so don't be alarmed if it's not your typical chocolate chip cookie dough.  You could add another 1/2 cup flour if you want.

Place dough in fridge for at least 1 hour.  Preheat oven to 375 degrees.  Roll out on well-floured surface and cut with cookie cutters.  If you don't use enough flour, there is no getting it off the counter in a recognizable shape - just too sticky.  The dough won't be workable it if gets warm, so keep the extra dough in the fridge when not in use.

Place cut out dough onto greased pan and bake for 8-10 minutes.  The cookies should not look brown or golden at all.  Carefully transfer to cooling rack.

*Buttermilk can be substituted: 3/4 cup milk + 1 tsp vinegar and let sit for 5 minutes before use

"Go Team" Cafe Apron

The whole time we lived in California we were close to my husband's parents.  Luckily, there was a cool uncle for the kids to play with still living at home.  My brother-in-law is now beginning his freshman year at BYU!  Congrats!  And in honor of his moving forward, I made something special.

There's actually 3 parts to the gift.

1) In the past year, after lots of tests, they realized he is lactose intolerant big time.  Even if something is cooked that had a milk product in it, his stomach (not intestines) will kill him for the next 3 days.  SO I put together a milk-less cookbook for him of easy meals for a freshman...and maybe a couple of easy ones with extra ingredients to impress the ladies.

2) All college kids are starving students, so I will be sending a box of some fun food items with the cookbook.  And probably a couple of ingredients/spices for the recipes.

3) AND this is an apron blog right?  It's high time I made another apron to post.  So here you are.  I wanted to make a team apron for the upcoming football season anyway, so this was perfect timing.  It's not perfect, but I think it's pretty cool - and manly enough for him to wear.  (Although my husband thinks all aprons are girly no matter what material they're made from).  I think I need to make one for myself now.  A cafe apron is great for team sports anyway because when you're serving nachos or buffalo wings you don't really need a full apron anyway.  Go make yourself one!


I used skinny ribbon for the ties.  So much easier and less time consuming than flipping ties right-side out.  

Crustless Quiche

I have never been the biggest fan of quiche, but I've now had two kinds recently that I love.  One of them is from the brunch with friends, but I still don't have that recipe.  The other is Chrissie's crustless quiche that I'm going to divulge to you today.  Chrissie is one of those people that is always put together, has a beautiful home, and is gracious to everyone.  You're missing out not knowing her.  Before we moved we had dinner at their home and this is what she made for us.  I called her a couple days ago to get the recipe and wa-lah, here we are today.

Be prepared for some very happy tastebuds!
Crustless Quiche
3 eggs
1 1/2 cups milk
1 1/2 cups bisquick
1/4 tsp salt
dash of pepper
1/4 cup melted butter
Filling options: 
1 cup grated cheese (cheddar and/or other)
diced ham
bacon bits
sausage without casing
spinach
sliced mushrooms
sliced green onion
diced tomatoes
diced peppers

Preheat oven to 350 degrees.  Beat all ingredients, except filling options, with a mixer until smooth.  Pour into an ungreased deep pie dish or other round pan of choice.  Evenly distribute your filling options of choice over the top of the bisquick mixture.  They will sink into the dish.  Top with the cheese last and press down lightly with a fork so the bisquick mixture is covering everything.  Bake for 35-40 minutes or until top is golden.

Welcome to the new quiche!

The Time Teller

Do you have the problem in your house where your little ones ask "what are we doing today," you rattle off a list of items, and they look at you and say, "what!?"  Then you back track, repeat maybe just the next thing you're going to do.  Then you go to the clock and point where the big and little hands should be when that next activity occurs.  This works well, but I think I have come up with an even better solution.

This is the Time Teller.

Instead of them asking you all the time, every morning you can organize it together and they can check it themselves throughout the day.
What you need:
Fabric - cut 16"x48"
Plastic
Coordinating Thread
A clock

Felt Gerber Daisy

Yes, here I am again with another felt flower.  I think I'm having too much fun!  I made another one as well, but I'm not completely satisfied with it (it needs a bag to go on), so you'll have to be happy with this one.  It is definitely the easiest of them all so far and only has two layers where the others have had three.  


What is Oozie?

While I lived in family student housing I was a resident assistant.  For a program that I organized, I had residents demonstrate their authentic cultural food for other people.  One of my good friends, Sondos, showed us how to make a traditional Syrian food: oozie.

It is light, has simple ingredients, and you really just eat it for the awesome yogurt sauce.  You can't fail with this one.  I made it the other night and already want to make it again.


Oozie
from Sondos

1 cup long grain white rice
2 cups water
0.5 - 0.75 lean ground beef
1 tsp cinnamon
1 tsp all spice
1 cup frozen peas
1 box frozen puff pastry sheets
Salt to taste

2 cups plain yogurt
1/2 hothouse cucumber, peeled and chopped finely
2 cloves pressed garlic
Palmful of dried or fresh mint leaves (fresh is so much better!)
Salt to taste
Juice of one lemon

Thaw puff pastry at room temperature 30-40 minutes prior to assembling the pockets.  See packaging for more details.

Preheat oven to 375 degrees.  In a large pot, saute ground beef with the cinnamon and all spice until browned; drain fat.  Pour in water and rice and bring to a boil.  Add peas, cover pot, and decrease heat to lowest setting.  Let that cook for about 20-25 minutes, or until all the water has evaporated.

Roll out and cut the puff pastry sheets.  (I used the fold lines and also cut three lines across - making 9 squares total).  Stretching each pastry sheets slightly, spoon some of the rice and beef mixture into the center of the square.  Fold up the points together and then squeeze the touching sides together to seal the package.  Set aside on a baking sheet lined with parchment paper (aluminum foil with some pam works too).  Repeat with all the squares until none are left.

Put the puff pastry packages into the oven for 20 minutes at 375 degrees, then lower the temperature to 350 degrees for another 10 minutes until golden in color.

While the packages are baking, make the yogurt sauce.  Combine the yogurt, chopped cucumber, garlic, mint, and lemon juice.  Then salt to taste.

*Oozie is typically eaten with the yogurt sauce spooned on top of the packages or on the side.

**I had to stop myself from eating the sauce all by itself!  So good.

P.S. I asked Sondos for anther good recipe to try, so I'll let you know when that happens.  She did give me her friend's Middle Eastern Cooking blog Bhibik ya NehNeh that I'm excited to try a few new things from.  

Peony Flower Tutorial

This was a very fun flower to make and there are lots of variations in folds that you could do.  Here's a tutorial for this version.  Let me know what you think and if you make one and LOVE it!


What you need:
Felt - color of your choice (I would get 2 sheets just in case)
fabric scissors
hot glue
thin cardboard
button
netting - optional
pin clasp 

Felt Peony Flower Brooch

I had so much fun with the Felt Dahlia Flower Brooch that I've decided to make some alterations on the design.  Instead of points on the ends of the flowers, we now have rounded curves.  I really think the netting is a nice compliment of textures with the felt.  As for the center, it can be made of felt, other coordinating fabric, a fabric covered button, or (as I choose here) a regular button.  The fun part about making them is that they are quick, there's lots of colors to choose from, and they really add a *pop.* 

I have some other ideas up my sleeve, but would you like a tutorial for this one?


P.S. This is what I did this weekend

This place was awesome!  Have you ever been?

Avocado Egg Rolls

These were a fun experiment.  My fryer had been on the counter for a couple weeks (after samosas) waiting for one more use before I tossed the oil.  It was between this and onion rings.  

BJ's avocado egg rolls really are so good and warm and I want one right now.  This is a pretty good knock-off recipe.  When we were there last I wrote down the ingredients from the menu and looked up some others - like the tamarind honey sauce.  Hopefully you'll like this little appetizer adventure, too.

Avocado Egg Rolls
serves 4

4 oz cream cheese
2 Tbsp sun dried tomatoes, small dice
1 Tbsp chipotle peppers, small dice
1/3 cup cilantro, chopped
1 1/2 Tbsp red onion
salt and pepper to taste
3 avocados
egg roll wrappers
oil

Sauce:
1/4 cup tamarind pulp
1/2 Tbsp balsamic vinegar

honey
olive oil
water

A Preview: Little Girl Pants and Avocado Egg Rolls

Last night I sewed up some pants for my little missy.  Pants are a hard thing to find for her.  Basically, we need all elastic waists and they just don't make them in her size.  I've taken measures into my own hands.

I have more to put together, so look for a tutorial in this next week.

AND - have you ever been to BJ's?  If not, it should definitely be on your list.  Here's the list of their appetizers and you must have the avocado egg rolls.  There's nothing like warm avocados for comfort food.  Wow these really got to me.


I decided to try my hand at them.  This is what I ended up with and they were really good.  Were they just like BJ's, no.  Were they still really good, yes.  I'll be sharing this recipe with you in the next couple of days.  Yum!

Wall-E Blanket

To continue with our boy theme, it's time for a guest spotlight!

This is Amy.

She's one of my super crafty friends who has a second nature for seeing something and creating it herself.  She loves "Enchanted" and really can make herself a dress from drapes.  She likes Birkenstocks and stilettos equally.  Her favorite color is yellow.  Something unique about her is that she was born and spent her younger years growing up in Saudi Arabia.  She has also lived in Tonga for a year and a half.  She make a mean asian chicken salad.  Although she does not have an affinity to baking cookies, she makes delicious apple blueberry pie.  She's kind, open-minded, a great listener, and completely real.  And if you see her examining the sidewalk, don't worry, she really likes ants.


Today I'm showing off the Wall-E blanket she made for her little buddy.  She wanted to make something unique and special that her son would like and this fit the bill.  It turned out so beautiful and I wish you could see in person.  I know beautiful is a funny word for Wall-E, but I'm really talking about the handi-work.  :)

To give you a better view of all the individual stitching, I captured some close-up photos.  She cut every piece out of felt first, positioned, pinned, and sewed her life away.  Her little boy has loved this blanket.  The back fabric is fleece and it is connected with a corresponding piece of fleece, then held together with a binding.


Isn't this detail amazing.  I should hire her.  I know she would appreciate some comment love!

My Monster and Me

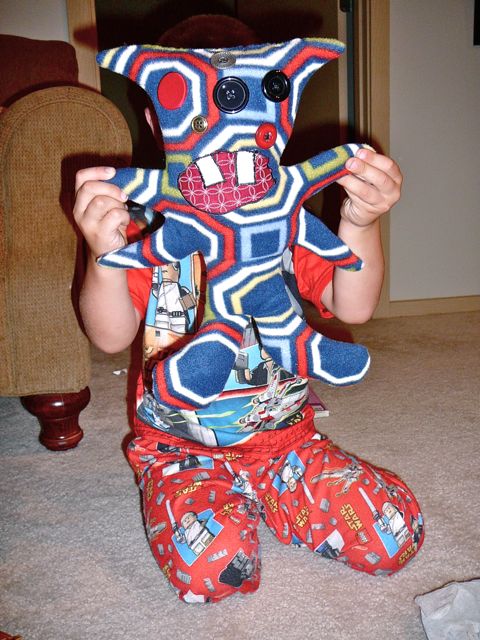
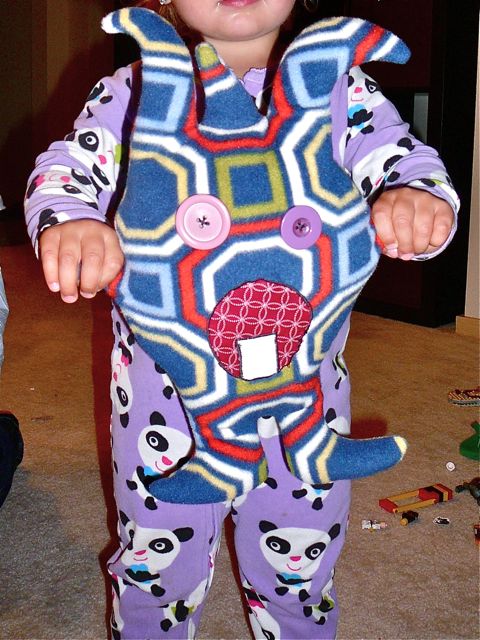
Next up on the boy list is MONSTERS!  I think you might want to make one as well.


Here's the how-to:


Take two pieces of felt the same size.  Lay them on top of each other.

Drawing with a permanent marker, decide the shape and layout of your monster.  Let the kids help you decide on the shape: hair, spikes, round or square head, lots of arms, tiny arms, feet or pogo foot, skinny or large, etc. 

Cut out your creature.  I cut about 1/4" inch outside the line to allow for a seam.

You should have two cutouts of the same creature on top of each other.

I pulled out my button collection and let the kids choose their button eyes.  I then hand sewed them on.

I cut out a wiggly round "growling" mouth and a couple teeth.  Then I sewed with the shortest stitch length possible around each piece to hold them onto the monster's face.

They should look something like this.  I put the matching shapes right side together and sewed all around the monster leaving an opening about 5 inches.  I had the kids help stuff them with Cluster Stuff, a small ball, soft fill - much better than batting for stuffed animals.  I hand sewed the opening.

Here's another cute monster from Little Bit Funky, she even sells them in her shop.

If you have some monsters to show off.  Comment me and I'll include them in this list!

Related Posts Plugin for WordPress, Blogger...